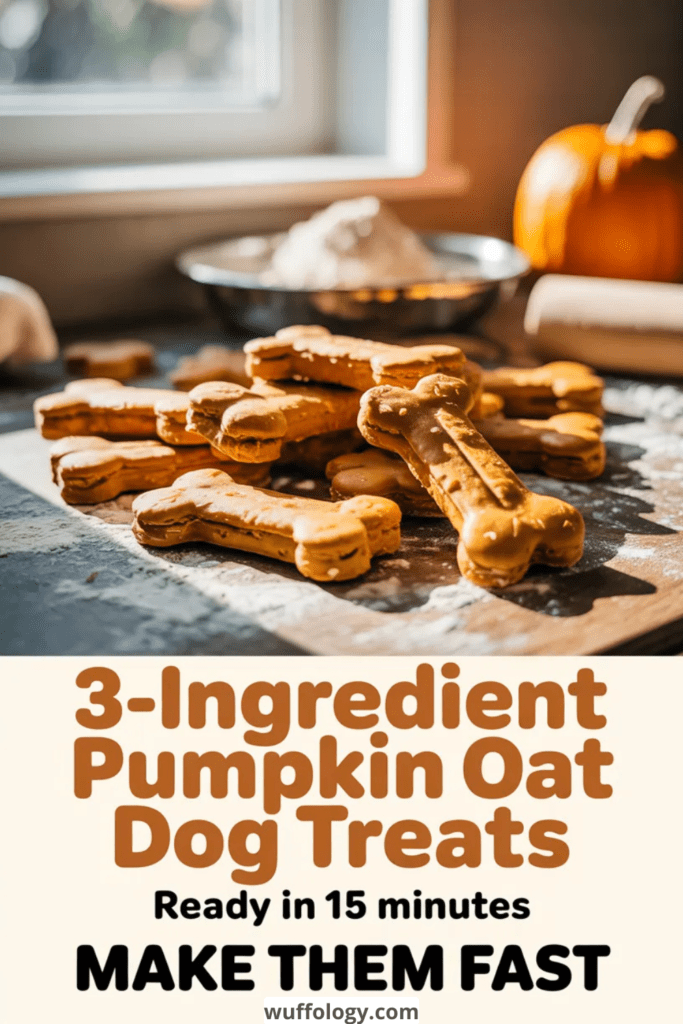
The moment you hear “pumpkin,” you probably picture cozy sweaters and whisking cinnamon into your latte. But what if I told you pumpkin could be the hero of a snack you actually want your dog to crave? Meet 3-Ingredient Pumpkin Oat Dog Treats You Can Make in 15 Minutes (No Junk!). Yes, seriously. Three ingredients, zero fluff, and a happy pup begging for more.
Why these treats hit every sweet spot
If you’re short on time but long on dog-parent pride, these treats check all the boxes. They’re simple, wholesome, and best of all, delicious for dogs without giving them a sugar shock. Pumpkin brings fiber and moisture, oats add gentle carbs and texture, and peanut butter (or water) holds it all together. FYI, I’m not here to pretend you’ll find a unicorn treat with a secret superfood ingredient—these are practical, tasty, and actually doable on a weeknight.
Three-ingredient magic: what you’ll need
Here’s the lowdown so you can prep fast and move on with your life.
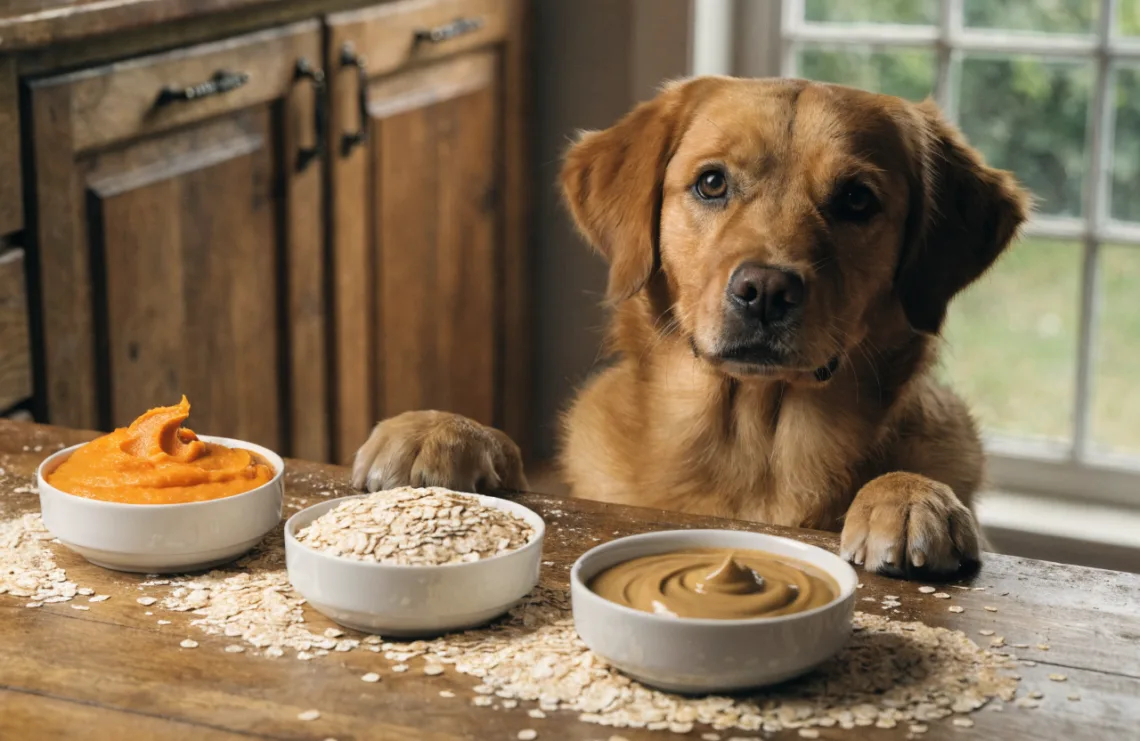
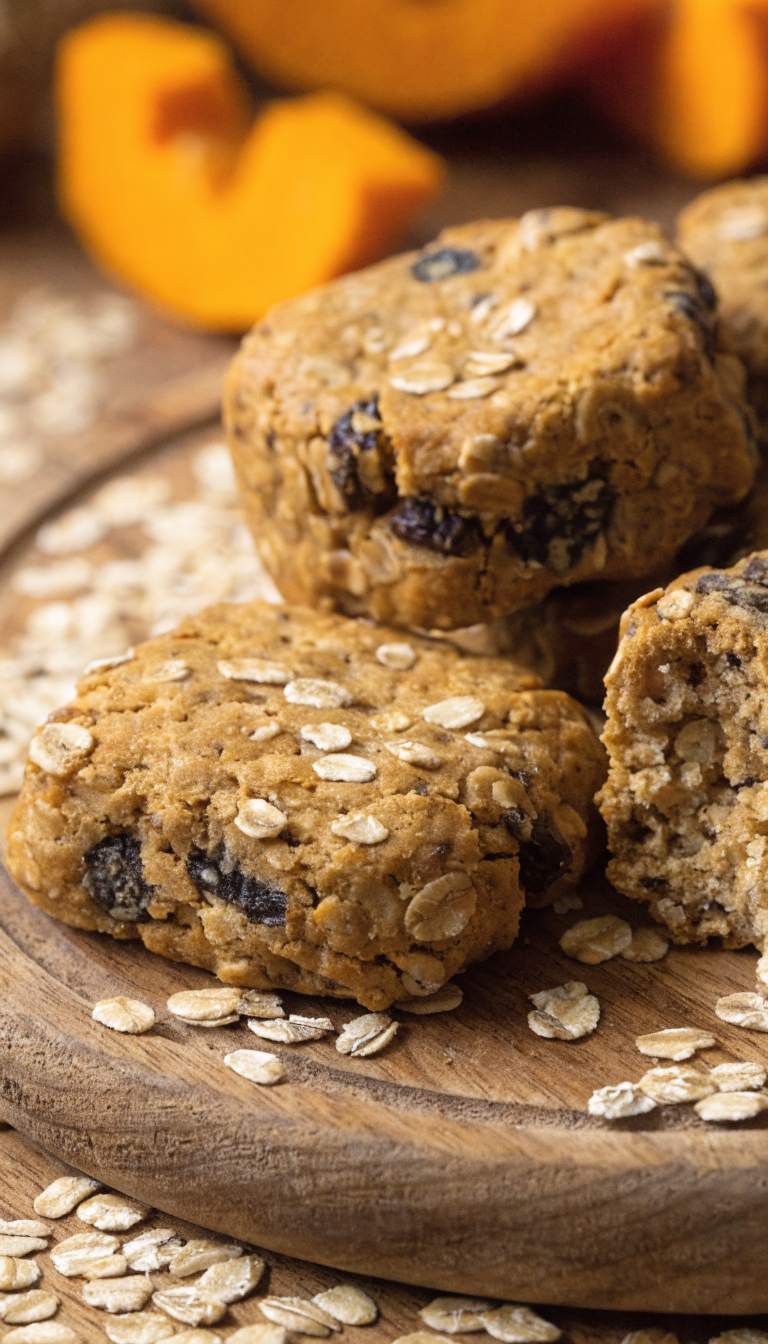
- Pumpkin puree (plain, unsweetened). Canned purée works best, not pumpkin pie filling with sugar and spices.
- Oats (rolled or quick oats, whichever you prefer). They provide texture and a gentle chew.
- Peanut butter (no xylitol, please). This is the glue that sticks the dough together and adds flavor. For sensitive pups, you can swap in applesauce or water.
Optional extras if you want to level up without complicating things: a pinch of cinnamon, a splash of water, or a handful of grated carrot. These aren’t required, but they can spice up the texture or aroma a touch—IMO they’re worth a quick toss in if you’re feeling fancy.
Step-by-step: turning ingredients into treats (15 minutes, no drama)
Here’s the fast track to cookie-cutting bliss.
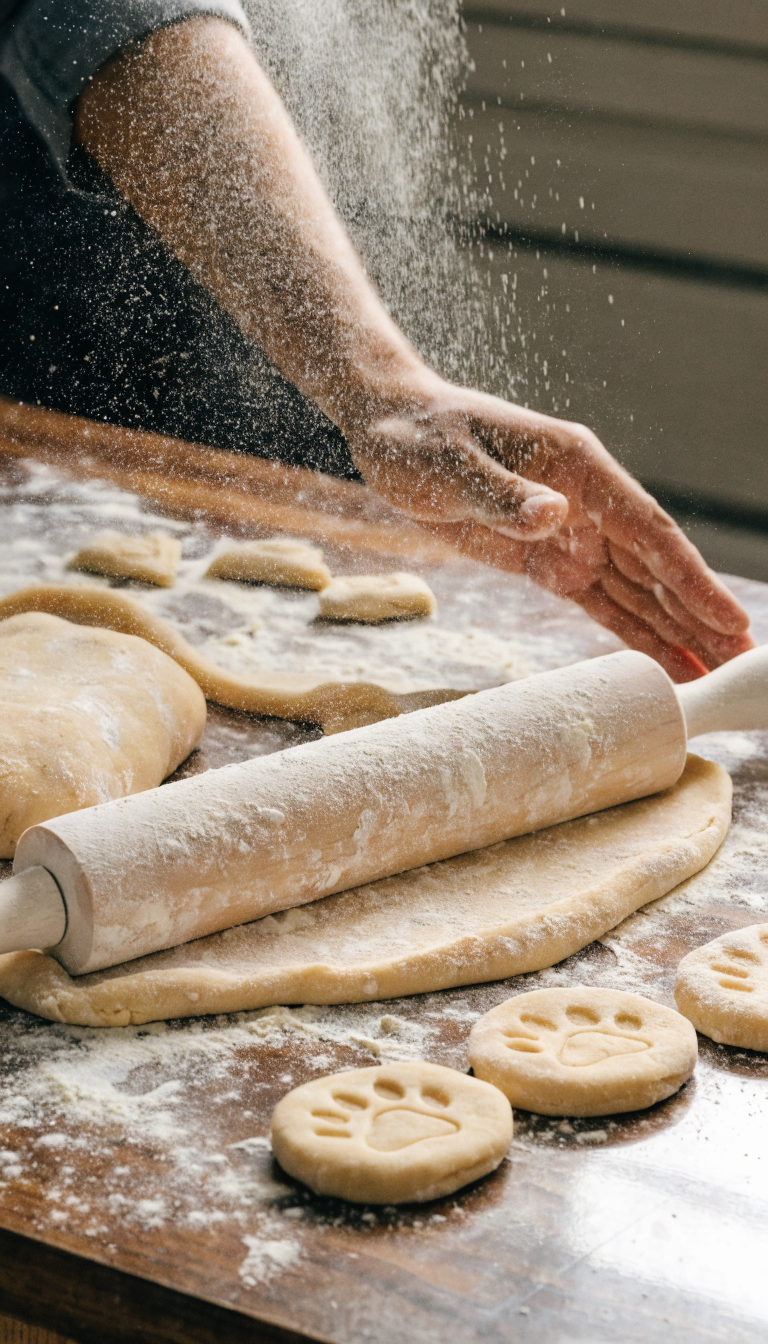
- Preheat the oven to 350°F (175°C). Line a baking sheet with parchment paper so cleanup feels like a breeze.
- Combine pumpkin puree and oats in a bowl. Stir until you’ve got a shaggy dough that holds together when you press it.
- Add peanut butter a little at a time. If the dough is too dry, splash in a spoonful of water or more pumpkin until the texture is workable but not sticky.
- Roll dough into a rough log or press flat and then cut into shapes with a cookie cutter, or simply spoon dollops for rustic treats. If you want a crisp edge, flatten slightly.
- Bake for 12–15 minutes until the edges turn golden. Let cool on the sheet for a few minutes, then transfer to a rack. They’ll firm up as they cool, promise.
Pro-tip: if you’re short on time, you can skip rolling and just drop spoonfuls onto the sheet. It’s still tasty, just a bit more artisan-chic in its rustic charm.
Texture talk: chewy, not crumbly
Dogs adore chew that’s easy on the teeth and not crumbly in the bowl. Here’s how to nudge your dough toward chewable perfection.
- Respect the ratio: 1 cup oats to 3/4 cup pumpkin puree is a good starting point. Adjust with a splash of water if necessary.
- Don’t overwork the dough. A few quick folds do the trick; over-kneading can make the treats tough.
- If you’re using freeze-friendly batches: roll shapes, flash-freeze on a sheet, then bag. Bake later from frozen and add 2–4 minutes to the bake time.
Storing and freshness
– Room temp: 3–5 days in an airtight container.
– Fridge: up to 2 weeks.
– Freeze: up to 3 months. Split into portion sizes so you don’t wade through a freezer block of disappointment.
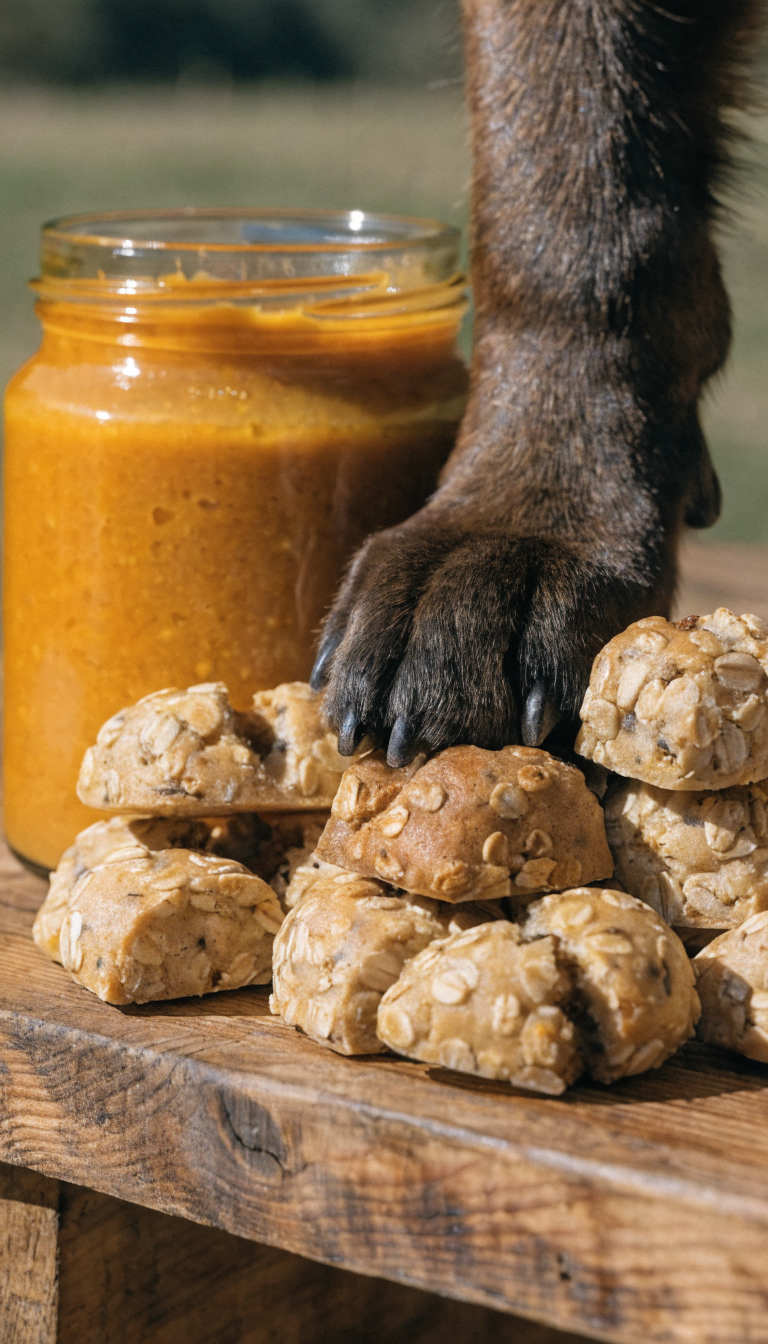
Want to keep things extra fresh? Keep a small tray of treats in the fridge for quick grabs after a walk or a training session. Your dog will thank you with enthusiastic tail wags and probably a high-five if you had hands free to deliver the snack.
Flavor tweaks: dialing in your dog’s preferences
Three base ingredients give you a solid canvas, but you can tailor the flavor without complicating the recipe.
- Bland but beloved: swap in a spoonful of unsweetened applesauce for extra moisture and a touch of sweetness dogs love.
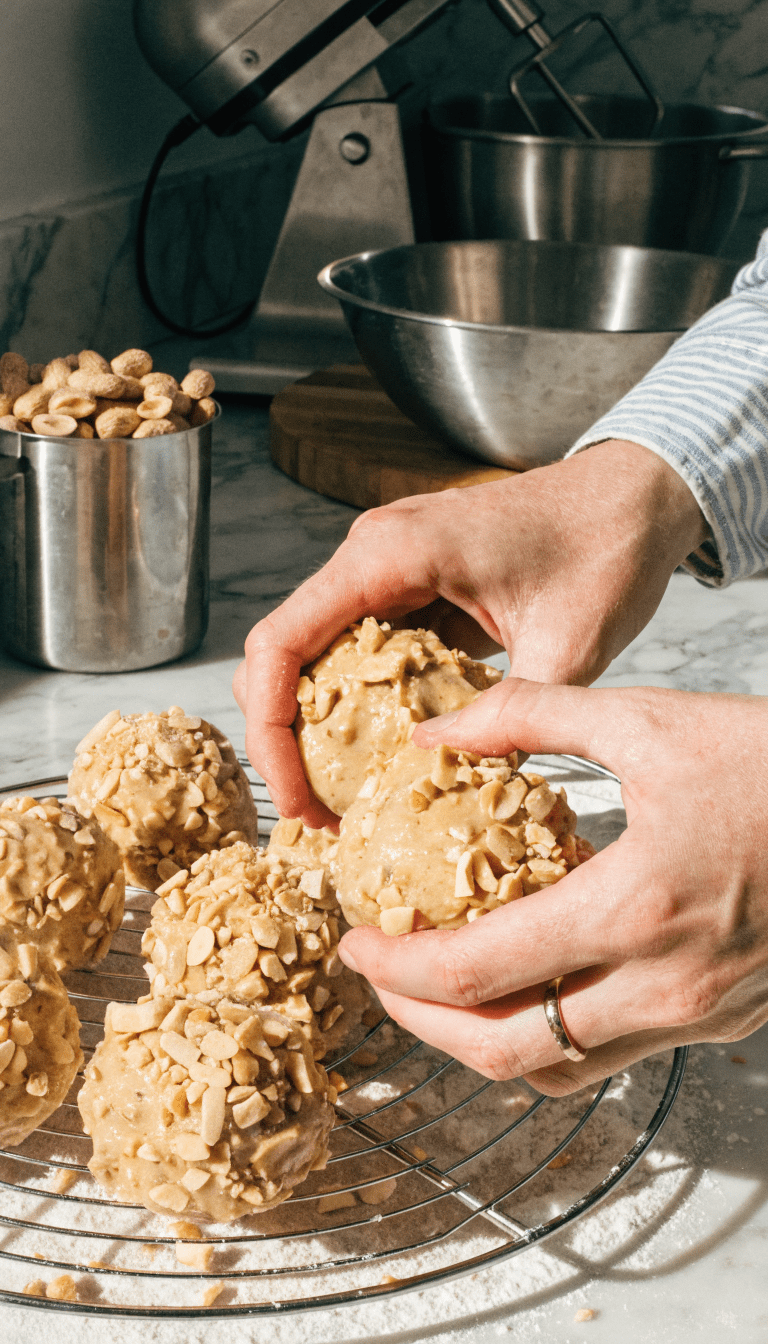
- Peanut butter variations: choose natural peanut butter with just peanuts and salt. If your pup isn’t a peanut fan, substitute with almond butter (check for xylitol in every product!), or more pumpkin and a splash of water.
- Spices: a pinch of cinnamon or ginger can please picky noses, but skip these if your dog has sensitive digestion or allergies.
FYI, never use xylitol-sweetened peanut butter. It’s a fast track to a heavy weekend visit to the vet, and nobody wants that drama.
Common pitfalls (and how to dodge them)
We’ve all been there: you mix too much, your dough is a soup, or your pup refuses to look at a single biscuit. Let’s nip these issues in the bud.
- Too wet: add more oats a tablespoon at a time until it holds together. Your dough should stay put when pressed, not ooze.
- Too dry: splash in a teaspoon of water or more pumpkin puree. You want a dough that’s pliable, not crumbly.
- Shape woes: if you’re using a cutter and the dough sticks, dust your surface lightly with oats or flour (a smidge, not a full sprinkle).
Mini batch, big payoff: feeding your pup smartly
Let’s talk about why these treats are a smart choice for dogs of all sizes.
- Simple ingredients mean fewer additives to worry about.
- Controlled portions help with weight management and energy balance. Start with small, dog-sized bites and adjust from there.
- Soothing texture provides a gentle chew that’s easy on the teeth and great for training sessions.
IMO, there’s something deeply satisfying about making treats that you actually feel good about feeding your furry friend. It’s the little win that makes you smile when you’re cleaning the kitchen at 9 PM, am I right?
Giant bite-sized FAQ
Can I use whole oats or quick oats?
Yes. Both work. Whole oats give a bit more chew, while quick oats mix in faster. If you’re feeding multiple dogs with different chewing needs, cut the dough into uniform shapes so every pup gets a fair bite.
What if my dog has a grain allergy?
You can swap oats for finely ground almond flour or coconut flour, but beware of moisture differences. Start with a little extra pumpkin puree to compensate. And always check with your vet if you’re unsure.
Are these treats safe for puppies or senior dogs?
Generally yes, but always consider individual dietary needs and chewing ability. For puppies, use smaller shapes to avoid choking hazards. For seniors, softening the bake a touch or adding a bit more pumpkin can help with moisture and chew ease.
Can I bake these in a mug or on the go?
Standard sheet-bake is the easiest, but you can get creative with a muffin tin for uniform bits or use a silicone mold for fun shapes. If you’re in a rush, pinches of dough microwaved briefly can yield a quick chew, but the oven delivers the best texture.
How can I tell they’re fully baked?
Edges should be golden and firm to the touch. If you’ve made chewy centers, give them a minute longer and keep an eye on the edges so they don’t burn. Cool completely before giving any to your pup.
How many should I feed per day?
Treats are treats, not meals. Start with 1–2 small biscuits for small dogs, 3–4 for medium, and 4–6 for large dogs, depending on their daily calorie intake. If in doubt, chat with your vet about portion size tied to your dog’s weight and activity level.
From my kitchen to your pup’s bowl: a quick personal note
I won’t pretend these are gourmet delights that will transform your dog’s entire worldview. But they are reliable, wholesome, and surprisingly tasty for a snack you whip up in minutes. I’ve used this recipe to reward dogs after long hikes, during training sessions, and even as a quick “thank you” to dog sitters who deserve a little extra love. If your pup has a favorite treat, you can bend the recipe to incorporate that flavor—so long as you avoid anything toxic for dogs (chocolate, grapes, raisins, onions, etc.).
If you’re like me and you have a small army of dogs with different tastes, you’ll be thrilled by how forgiving this three-ingredient base is. One batch makes a decent stash, and you’ll probably keep a few in the fridge for the week and freeze the rest for later. The best part? There’s no jury of peppery health questions to answer afterward, just wagging tails and eager noses.
Conclusion
Three ingredients, 15 minutes, zero junk. These Pumpkin Oat Dog Treats prove that you don’t need a long recipe card to make something your dog actually loves. They’re simple, flexible, and kind to the wallet—and FYI, your kitchen will smell like fall even if it’s still July outside.
So, grab your pumpkin, oats, and peanut butter, and get baking. Your dog will thank you with a chorus of happy barks and a tail that won’t stop wiggling. If you try a flavor tweak or two, tell me how it goes—I’m always down for a good dog-treat experiment.