Last updated: August 22, 2026
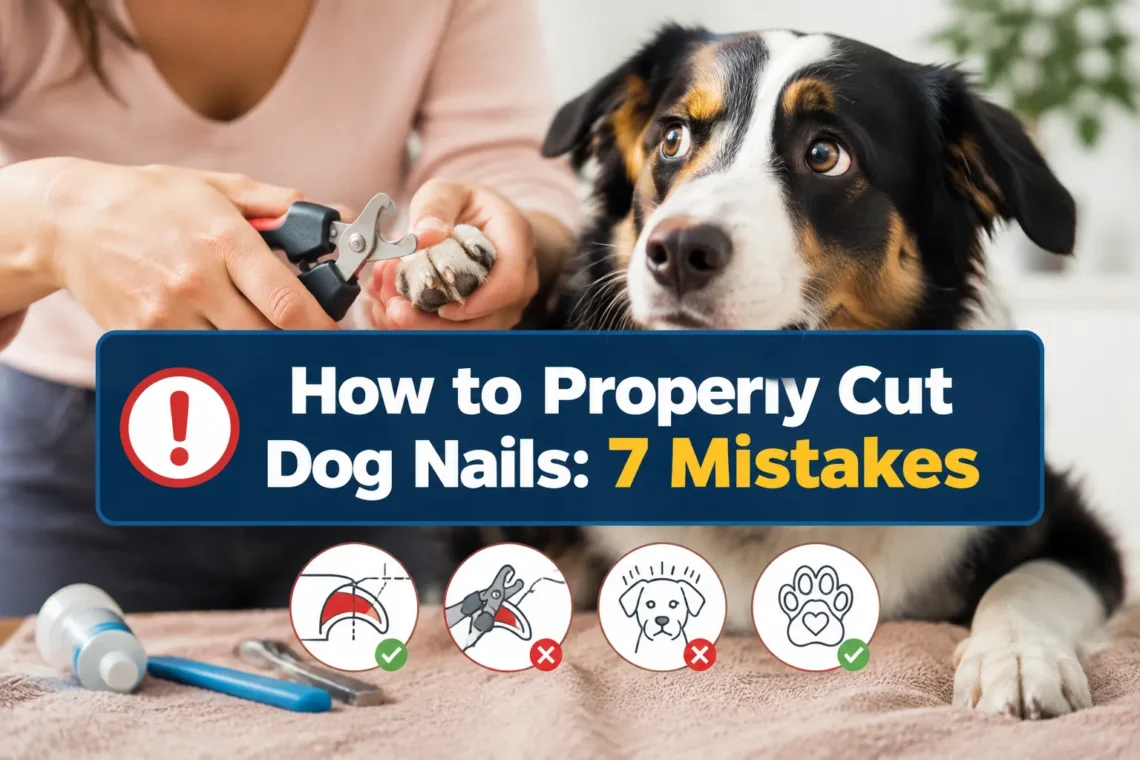
Quick Answer: To properly cut dog nails, use sharp clippers or a grinder, trim small amounts at a 45-degree angle, and avoid the quick (the blood vessel inside the nail). Reward your dog generously before, during, and after each session. Most dogs panic because of past bad experiences or rushed technique – not because nail trimming is inherently scary.
Key Takeaways
- Trim dog nails every 3-4 weeks to prevent overgrowth and joint pain
- Always cut at a 45-degree angle and take off only small amounts at a time
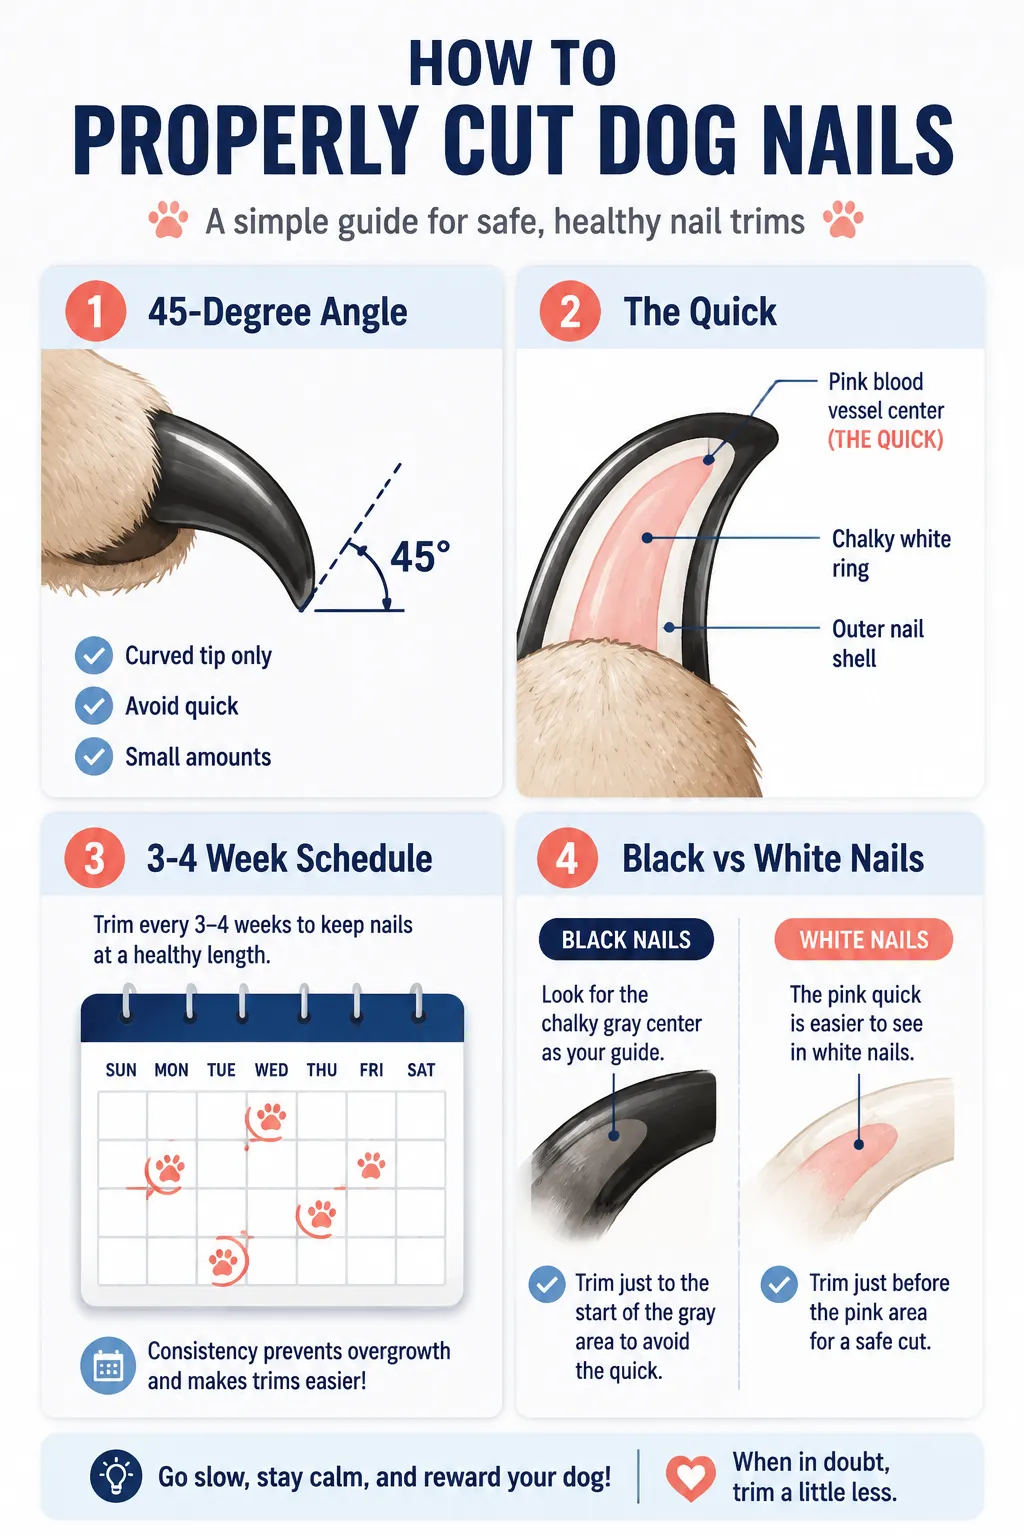
- The quick is the pink blood vessel inside the nail – cutting it causes pain and bleeding
- On black nails, look for a chalky white or gray center as your “stop” signal
- High-value treats turn nail trimming from a battle into a routine your dog tolerates
- Desensitization over several short sessions works far better than forcing it once
- Nail grinders are a great alternative for dogs who panic at the sound of clippers
- If you nick the quick, apply styptic powder immediately – it stops bleeding fast
- A puppy introduced to nail handling early is far less likely to panic as an adult dog
- When in doubt, a professional dog groomer or veterinary team is always a safe option
Why Does My Dog Panic When I Cut Their Nails?
Most dogs panic during nail trimming because they associate it with pain, restraint, or sudden loud sounds. According to VCA Animal Hospitals, fear and anxiety around nail trims are among the most common grooming complaints from dog owners. The fix is almost always about changing the experience – not forcing the dog to comply.
Common panic triggers include:
- Being held down or restrained too tightly
- Clippers that are dull and crush the nail instead of cutting cleanly
- A previous cut that nicked the quick and caused pain
- The clicking sound of the clipper, which some dogs find startling
- Moving too fast through the session without breaks or rewards
If your dog pulls away, growls, or shakes during trimming, those are stress signals worth taking seriously. Pushing through those signals is Mistake #1 – and it makes every future session harder.
How to Desensitize Your Dog to Nail Trimming
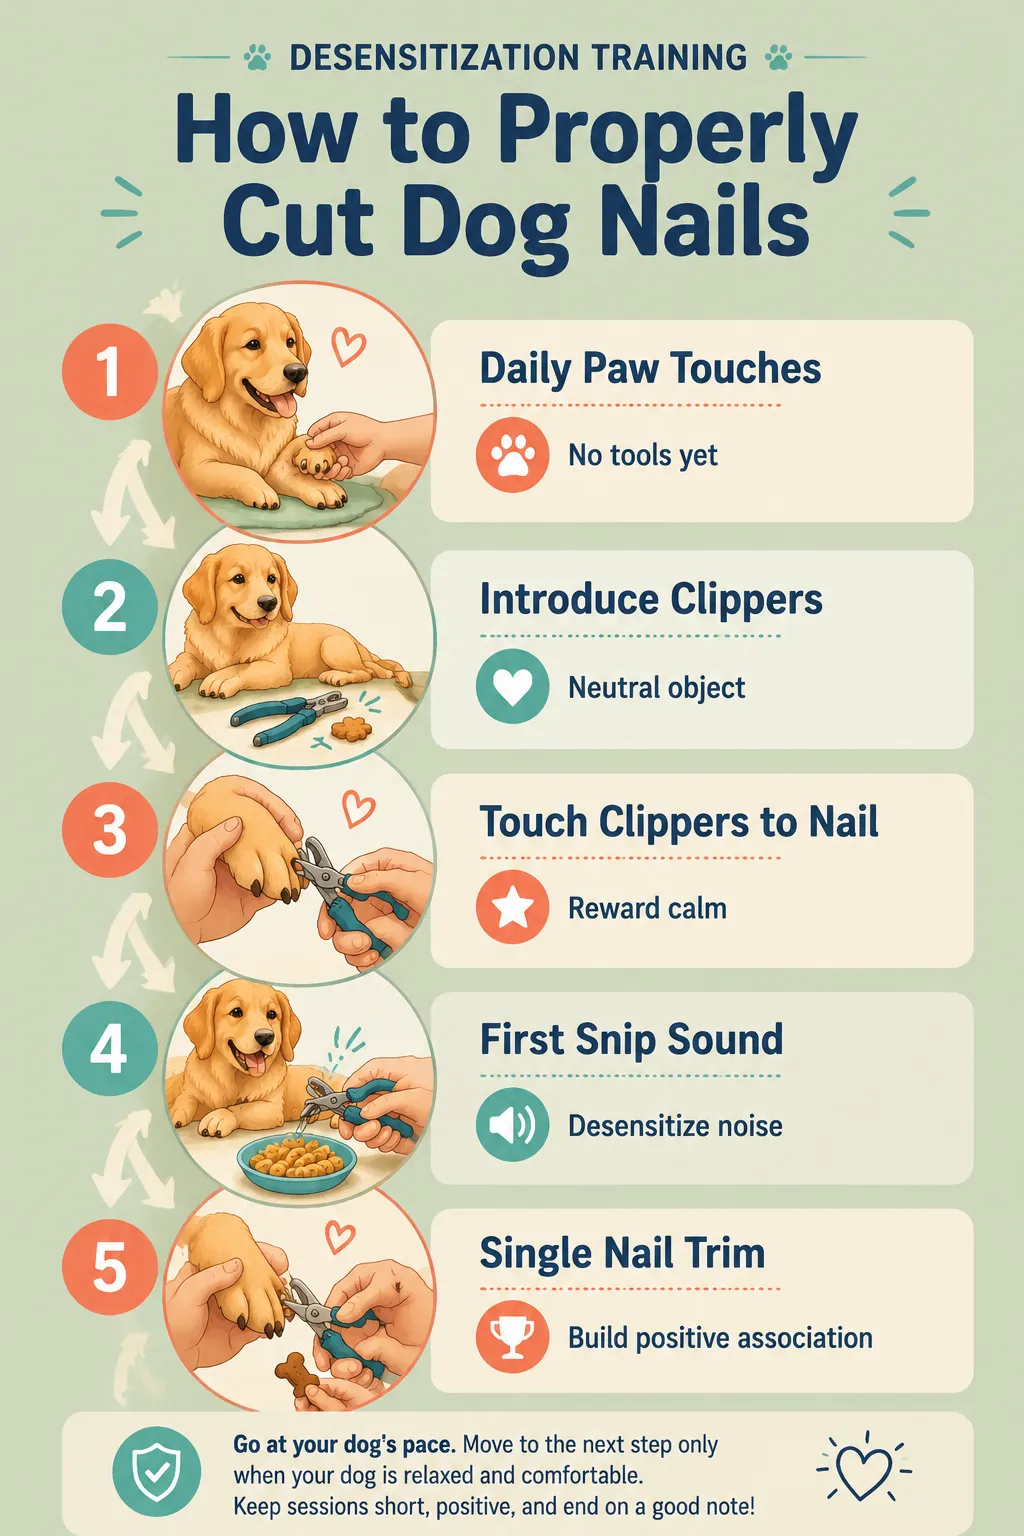
Desensitization means teaching your dog that nail trimming predicts good things, not scary ones. The Ontario SPCA recommends starting with just touching your dog’s paws daily, then introducing the clippers as a neutral object before ever using them.
Here’s a simple 5-step approach:
- Touch paws daily – Handle your dog’s feet every day, even when you’re not trimming. Pair every touch with a treat.
- Introduce the tool – Let your dog sniff the clippers or grinder. Click or buzz it near (not on) the dog. Treat generously.
- Touch the tool to the nail – No cutting yet. Just contact. Treat after.
- Clip one nail – Just one. End the session. Big reward.
- Build gradually – Add one or two nails per session until your dog is comfortable with a full trim.
This process can take days or weeks for a fearful dog. That’s normal. Rushing it is Mistake #2.
For a puppy, start this process during the puppy essentials life skills stage – ideally before 12 weeks. A puppy who grows up having nails trimmed regularly is far easier to work with as an adult dog. Programs like puppy prep guides from McCann professional dog trainers and other professional dog trainers in Canada share this same advice: early, positive exposure is everything.
Pro tip: Use a lick mat with peanut butter or wet food during trimming. It keeps your dog’s mouth busy and creates a positive association at the same time.
How to Properly Cut Dog Nails: Angle, Depth, and Technique
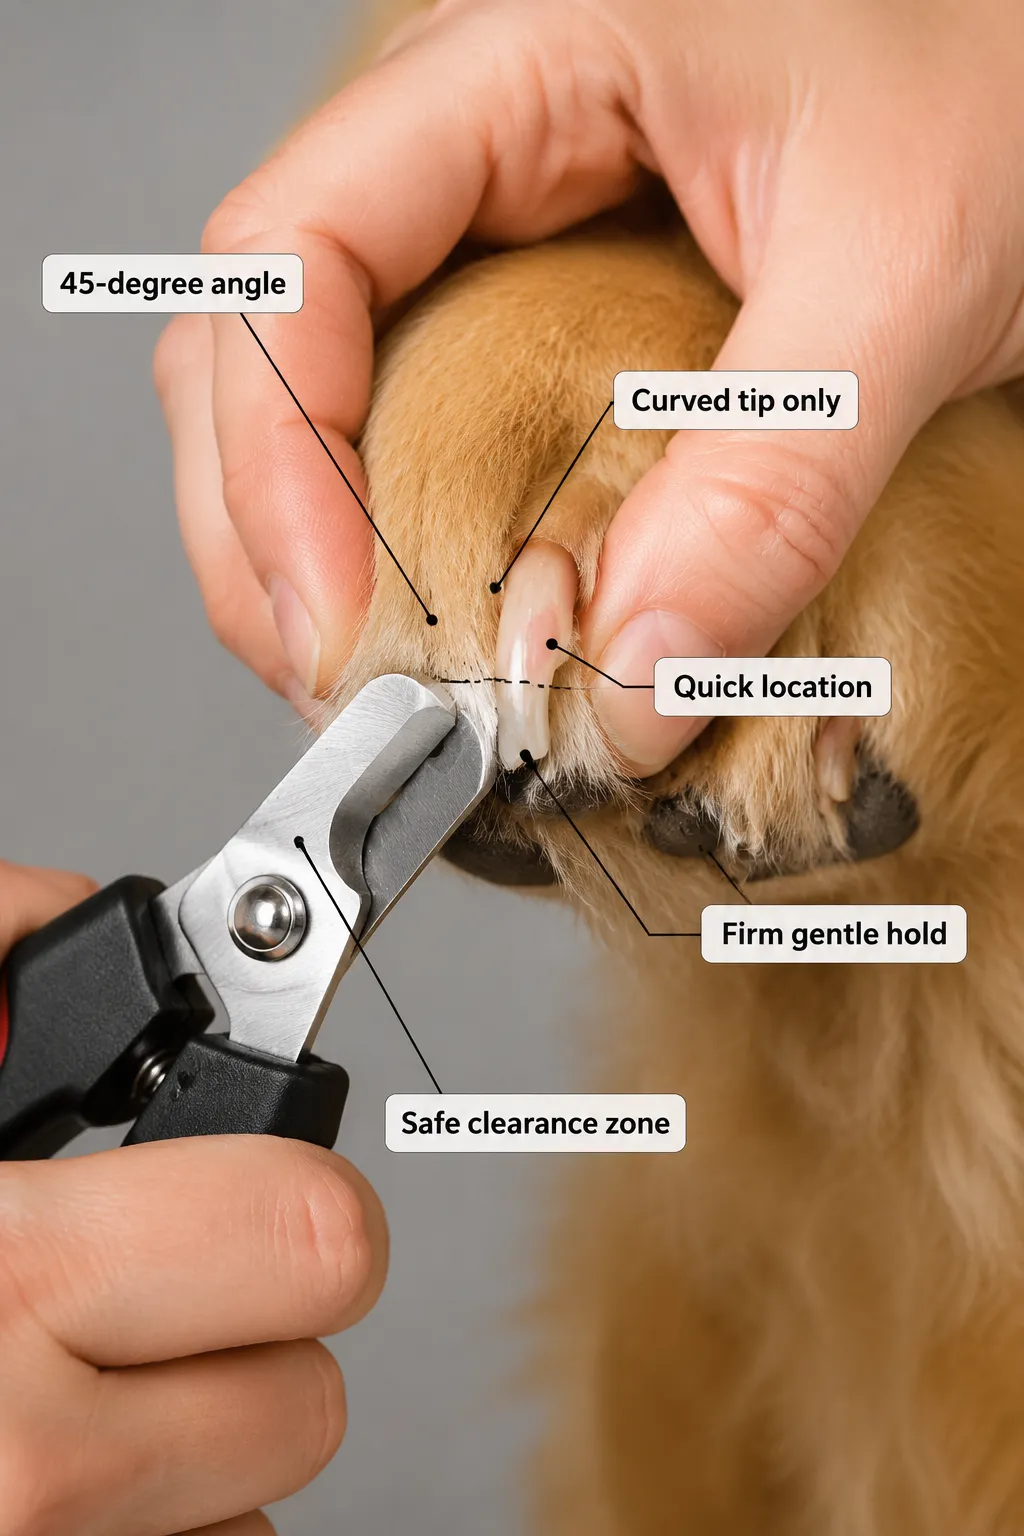
Cut dog nails at roughly a 45-degree angle, taking off only the curved tip. The goal is to stay well clear of the quick – the pink blood vessel that runs through the center of the nail. The Animal Humane Society recommends trimming just the hook-like tip that curves downward, which removes length without risking the quick.
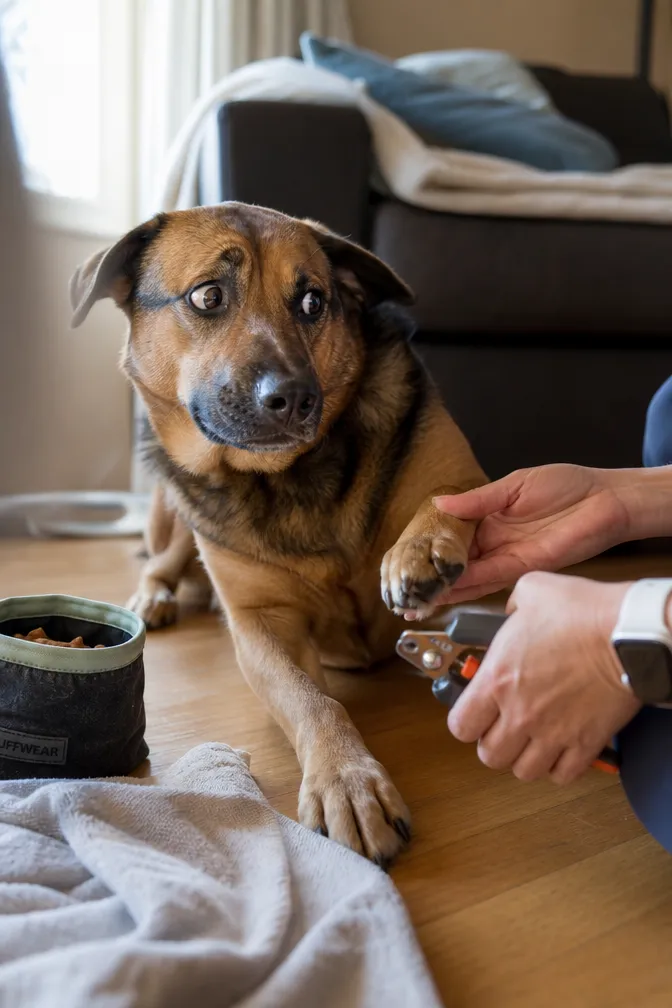
Step-by-step technique:
- Hold your dog’s paw firmly but gently – don’t squeeze
- Position the clipper at a 45-degree angle to the nail
- Cut only the tip – the last 2mm of the curved part
- Check the cut surface: a white or light gray center means you’re safe; a dark dot in the center means you’re close to the quick – stop
- Move to the next nail, rewarding between each one
- Don’t forget the dew claw – it doesn’t touch the ground, so it grows faster and can curl into the paw pad if left untrimmed
How to cut black dog nails when you can’t see the quick:
This is one of the most common challenges. On dark or black nails, look at the cut surface after each small snip. When you see a chalky white or grayish center, you’re getting close. A small dark dot in the middle means stop immediately. The Toronto Humane Society’s nail trimming guide confirms this visual cue as the most reliable method for dark nails.
What Happens If You Cut Dog Nails Too Short
Cutting the quick causes immediate pain, bleeding, and a strong negative memory your dog won’t forget. PetMD notes that accidentally cutting into the quick is the single biggest reason dogs become fearful of future nail trims. It’s not the end of the world, but it does require quick action.
If you cut into the quick:
- Apply styptic powder directly to the nail tip and hold for 30 seconds
- If you don’t have styptic powder, cornstarch works as a backup
- Keep your dog calm and off rough surfaces for a few minutes
- Do NOT continue trimming that session – end on a positive note with treats
- Watch for signs of infection over the next 48 hours: swelling, discharge, or limping
Cutting nails too short is Mistake #3 in our list. The fix is simple: trim small amounts, check the cut surface, and stop early rather than late.
What’s the Best Tool for Cutting Dog Nails: Grinders vs Clippers
Both nail grinders and clippers work well – the best choice depends on your dog’s size, nail thickness, and how they react to sound or vibration. American Humane recommends scissor-style or guillotine clippers for most home use, while grinders are especially useful for dogs who crack or split nails easily.
| Tool | Best For | Watch Out For |
|---|---|---|
| Scissor Clippers | Small to medium dogs, thin nails | Dull blades crush instead of cut |
| Guillotine Clippers | Small dogs, precise control | Blades wear out fast |
| Nail Grinder | Large dogs, thick nails, anxious dogs | Noise and vibration can startle dogs |
| Human Clippers | Not recommended for dogs | Too small, wrong angle, can split nails |
Can you use human nail clippers on dogs? Technically yes for very small puppies, but it’s not ideal. Human clippers are designed for flat nails and can split a dog’s thicker, rounder nail. For any dog over a few months old, invest in a proper dog nail clipper set.
Dull tools are Mistake #4. A sharp clipper cuts cleanly in one motion. A dull one squeezes and crushes, which hurts and causes panic even when you don’t cut into the quick.
How to Tell If Your Dog’s Nails Are Too Long
Your dog’s nails are too long if you can hear them clicking on hard floors when they walk. A properly trimmed nail should just clear the ground when your dog stands naturally. The Ontario SPCA notes that overgrown nails force dogs to shift their weight backward, which puts stress on joints and can cause long-term posture problems.
Other signs nails need trimming:
- Nails visibly curl or hook at the tip
- Your dog slips on smooth floors more than usual
- The dew claw has started curving toward the leg
- Your dog licks or chews at their paws frequently
Overgrown nails are Mistake #5 by omission – skipping regular trims lets the quick grow longer too, making future trims harder. The longer you wait, the less nail you can safely remove each session.
How Often Should You Cut Your Dog’s Nails
Most dogs need nails trimmed every 3-4 weeks. Active dogs who walk on pavement regularly may go 4-6 weeks between trims because hard surfaces naturally wear the nails down. Less active dogs, senior dogs, and dogs who walk mostly on grass or carpet need more frequent attention. For more on caring for older dogs, see our guide on how to care for senior dogs.
Skipping regular trims is Mistake #6. When nails grow too long, the quick extends further into the nail, which means you can’t cut as much off without causing pain. Regular trimming actually keeps the quick shorter over time.
For a puppy, start trimming or at minimum handling the nails weekly from the first week home. This is part of the puppy prep guide approach that McCann professional dog trainers and veterinary teaching hospital programs consistently recommend. WSU’s veterinary medicine resources and similar veterinary hospital programs share the same guidance: early, frequent handling prevents lifelong resistance.
Should I Take My Dog to a Groomer or Do It Myself
Either option works – the right choice depends on your dog’s temperament and your comfort level. Professional dog groomers and veterinary teams handle difficult dogs daily and have tools and techniques most home setups don’t. If your dog has a history of aggression during nail trimming, a veterinary hospital with sedation options is the safest route.
Choose a groomer or vet if:
- Your dog has bitten or snapped during past trims
- Nails are severely overgrown and need a professional assessment
- You’ve tried home trimming multiple times and it’s getting worse, not better
Do it yourself at home if:
- Your dog is calm or only mildly anxious
- You’re committed to short, frequent sessions with high-value rewards
- You want to save money and build a stronger bond with your dog
Nails do-it-yourself trimming is absolutely achievable for most dog owners with the right tools and patience. The key is never forcing it – which brings us to Mistake #7: “getting it done” at any cost. Holding your dog down and pushing through panic creates trauma, not compliance. If your dog is truly shutting down, stop, treat, and try again tomorrow.
For dogs who need extra calm before grooming sessions, 12 brain games for dogs can help burn off anxious energy beforehand. Also, pairing nail sessions with high-value homemade treats makes a real difference in how your dog feels about the whole experience.
Signs Your Dog Has an Infection From Nail Cutting
A mild nick of the quick heals on its own within a day or two. But if you notice swelling, warmth, discharge, or your dog is limping or licking the paw obsessively after a trim, those are signs of a possible infection that needs veterinary care. This is a genuine emergency amp situation if the nail bed becomes red and swollen with pus.
Watch for:
- Redness or swelling around the nail that worsens after 24 hours
- Yellow or green discharge from the nail area
- Your dog refusing to put weight on the paw
- Fever or lethargy alongside paw symptoms
Contact your veterinarian promptly if you see any of these. Most nail infections respond well to antibiotics when caught early.
How to Hold Your Dog Still While Trimming Nails
The best way to hold a dog still during nail trimming is to keep them comfortable, not restrained. Forced restraint raises cortisol levels and makes dogs more reactive over time. Instead, position your dog in a way that feels natural to them – lying on their side, sitting in your lap, or standing on a non-slip mat.
Tips for keeping dogs calm and still:
- Use a lick mat or frozen treat to keep them occupied
- Work in a quiet, low-distraction space
- Keep sessions under 5 minutes, especially at first
- Take breaks between paws if your dog shows stress signals
- For interactive dog engagement, try having a second person offer treats while you clip
For dogs who are highly reactive, a professional dog groomer or veterinary hospital team with fear-free training is worth the investment. WSU’s veterinary medicine programs and similar veterinary teaching hospital programs in the US and Canada share resources on fear-free animal handling that are worth reading if you have a particularly anxious dog.
FAQ: How to Properly Cut Dog Nails
How do you cut a dog’s nails for beginners?
Start with sharp clippers designed for dogs. Hold your dog’s paw gently and cut only the very tip of the nail at a 45-degree angle – just the curved hook. Give a high-value treat after each nail. Do one or two nails per session at first, then build up. Never rush, and always stop if your dog shows signs of stress.
What angle do you cut a dog’s nail?
Cut dog nails at approximately a 45-degree angle, following the natural curve of the nail tip. This angle removes the sharp hook cleanly while keeping you safely away from the quick. Cutting straight across is less ideal because it can leave sharp edges and doesn’t follow the nail’s natural shape.
How should a dog’s nail look when clipped properly?
A properly clipped dog nail should be short enough that it just clears the floor when the dog stands naturally – no clicking sound on hard surfaces. The cut surface should look smooth and show a white or light gray center. There should be no sharp edges, splitting, or visible pink tissue from the quick.
How do vets cut a dog’s nails that won’t let you?
Veterinary teams use several strategies for dogs who resist nail trimming. These include fear-free handling techniques, high-value treats, positioning aids, and sometimes a light sedative or anti-anxiety medication for dogs with severe fear. A veterinary hospital may also recommend a behavioral plan with gradual desensitization as part of their animal care programs. In emergency amp situations where nails are dangerously overgrown, brief sedation is sometimes the safest and most humane option.
Conclusion
Learning how to properly cut dog nails doesn’t have to be a battle. The 7 mistakes – pushing through panic, rushing desensitization, cutting too short, using dull tools, skipping regular trims, forcing restraint, and “getting it done” at any cost – all have simple fixes once you know what to look for.
Your action plan:
- Check your dog’s nails today – are they clicking on the floor?
- Gather the right tools: sharp clippers or a grinder, styptic powder, and high-value treats
- Start a 5-minute daily paw-handling routine if your dog is anxious
- Trim one nail at a time until both you and your dog build confidence
- Set a calendar reminder every 3-4 weeks for regular trims
For more help with your dog’s overall care and grooming routine, check out our guide on how to brush your dog’s teeth – another task that goes much smoother with the same patient, reward-based approach.
You’ve got this – and so does your dog. 🐾